|
Page 3 of 5
Step Two:
Rip the Rough Clip You Want
Using Mac the Ripper
Insert the DVD that has the clip you
want on it into your drive. The Apple DVD Player will likely auto-start. You can close it and then open Mac the Ripper, which should detect the DVD. You should have a screen that looks something like this:
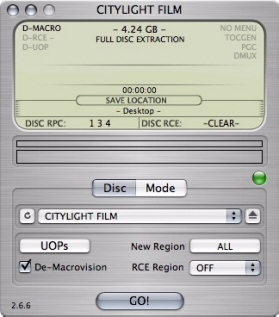
The top half of this screen gives you
a lot of information about the DVD, such as whether it is copyright-protected
using Macrovision, etc. The default settings on this screen
will work most of the time for most people: it will remove the Macrovision
protection, remove any region encoding, etc.
Next, click on the "Mode"
button in the middle of the screen. You should have a screen that looks
something like this:
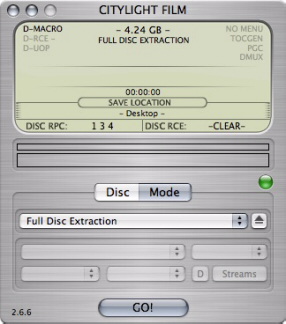
Note that the default setting is "Full
Disc Extraction," meaning that it is set to extract the entire
disc including the main title, any menus, any special features, etc.
Since you only want a short clip, to save time you should extract only
the chapter or two of the DVD that you want to show in class.
Here's how that looks:
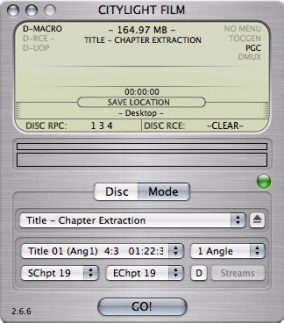
Choose "Title Chapter Extraction"
and then, from the choices on the bottom row, select the chapter(s)
you want. In the above example, I want only chapter 19, so I selected
Start Chapter 19 ("SChpt 19") and End Chapter 19 ("EChpt
19").
If you are not sure which chapter contains
the scene you want, you may have to leave Mac the Ripper, go into DVD
Player, and look through the chapters until you find the ones you need.
NOTE: On the Mode page,
you can also decide whether to extract subtitles, a second audio program,
alternate camera angles, or other elements that your DVD may contain.
See the Help info for Mac the Ripper for how to do this. For the
purpose of this tutorial, we're assuming you want the primary audio
program and no subtitles.
Once you have selected the elements
that Mac the Ripper should extract, click on "GO!" and extraction
will begin. This should only take a couple of minutes for a single
chapter.
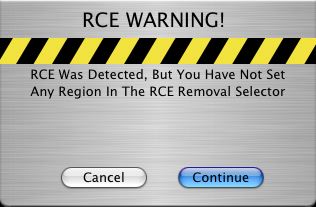 NOTE: The first time you rip a DVD with Mac the Ripper, you may get the error message, "RCE was detected. But you have not set any region in the RCE Removal Selector." It is safe to click Continue here. To avoid it in the future, however, click the Disc button (next to the Mode button), and then click the RCE Region button (which is probably set to Off) and pick a region. For more about what regions mean, please see the Mac the Ripper Help info. NOTE: The first time you rip a DVD with Mac the Ripper, you may get the error message, "RCE was detected. But you have not set any region in the RCE Removal Selector." It is safe to click Continue here. To avoid it in the future, however, click the Disc button (next to the Mode button), and then click the RCE Region button (which is probably set to Off) and pick a region. For more about what regions mean, please see the Mac the Ripper Help info.
 When the extraction process is complete, you will
have a folder on your Desktop with the name of the DVD (for the above
example, mine was "CITYLIGHT
FILM Title 1 (Ch19)." That folder should contain another
folder entitled "VIDEO_TS." And that folder should contain
a .VOB file, also with the name of the DVD. When the extraction process is complete, you will
have a folder on your Desktop with the name of the DVD (for the above
example, mine was "CITYLIGHT
FILM Title 1 (Ch19)." That folder should contain another
folder entitled "VIDEO_TS." And that folder should contain
a .VOB file, also with the name of the DVD.
The next step is to open this .VOB file in MPEG Streamclip.
|
